Creating a user profile

  1. In the Module menu, click Administration.
  2. In the Menu bar, click Security.
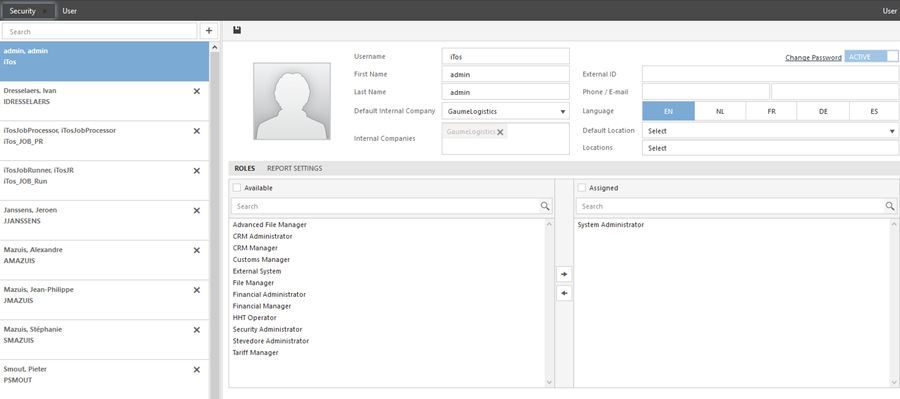
  3. In the Submenu, click User.
    An overview of all user profiles appears.
  4. Click .
  5. Fill in a Username, First Name and Last Name.
  6. Select a Default Internal Company, the most used internal company, which opens automatically when you log in, and all possible Internal Companies you want to use.
  7. Toggle the Active button to (de)activate a user profile.
  8. Optionally, fill in the other fields.
  9. Optionally, click the user icon to upload a picture.
  10. Assign roles to a user in the Roles tab:
    Note: Depending on the role you are assigned, certain features will not be visible to you. Contact the Systems Administrator for changes.
    1. Click the role(s) you want to assign to a user in the Available column.
      Note: Use the Ctrl button to select multiple values or use the check box to select all values.
    2. Use the arrow buttons to move them to the Assigned column and vice versa.
  11. Edit personal printing settings for reports in the Report Settings tab:
    1. Click the Report Settings tab.
    2. Click .
    3. Select a Type of report and a Printer from the drop-down menus.
      Tip: Click to delete the line.
  12. Click in the task bar to save any changes.